Introduction
Many beginners start their website without thinking about backups. They only understand the value after a serious issue. This can create stress, data loss, and business delays. A simple WordPress site backup can save hours of work. It can also protect your pages, posts, images, settings, and customer data.
When you backup WordPress website files, you protect the main parts of your site. These parts include themes, plugins, uploads, and media files. Your database also needs backup because it stores important content. It keeps posts, pages, users, comments, settings, and orders. A complete backup should always include both files and database.
Beginners often feel backups are too technical. They may think coding knowledge is needed. However, a WordPress backup plugin makes the process simple. You can create backups from your WordPress dashboard. You do not need to use cPanel or FTP. This makes backup management easier for non-technical users.
In this guide, you will learn the basic backup process. You will also understand why UpdraftPlus is useful for beginners. The aim is simple. You should feel confident while protecting your WordPress website.
What Is UpdraftPlus and Why Do Beginners Use It?
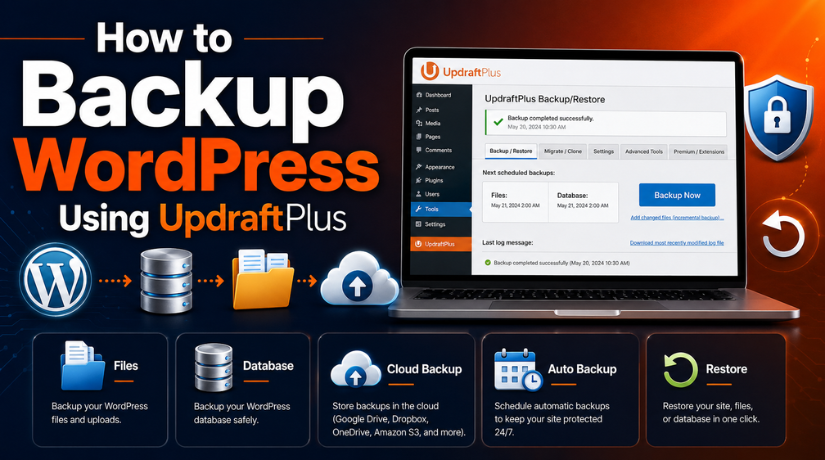
UpdraftPlus is a popular WordPress backup plugin. It helps you create, store, and restore website backups. It can back up your website files and database. These two parts together make a complete website backup. This makes UpdraftPlus helpful for beginners and website owners.
An UpdraftPlus backup can include themes, plugins, uploads, and database files. Themes control your website design. Plugins add features to your website. Uploads include images, videos, and documents. The database stores your website content and settings. If any part is missing, restoration may not work properly.
Beginners use UpdraftPlus because it is easy to manage. The plugin works inside the WordPress dashboard. You can create a backup with a few clicks. You can also restore your website from saved backup files. This reduces the need for advanced technical knowledge.
UpdraftPlus also supports manual backups. This is useful before major website changes. You can take a backup before updating plugins. You can also create one before changing your theme. This gives you a safe restore point. If something breaks, you can bring the site back.
What You Need Before Creating a WordPress Backup with UpdraftPlus
Before creating a WordPress backup, prepare a few basic things. This helps UpdraftPlus work smoothly. It also reduces backup errors. A complete UpdraftPlus backup should include both website files and the database. This helps restore your website properly if something goes wrong.
Make Sure You Have WordPress Admin Access
You need full admin access before using any WordPress backup plugin. Admin access allows you to install plugins. It also lets you change backup settings safely. Without admin access, you may not see the plugin section. You may also not be able to connect remote storage.
Check Your Website Hosting Storage Before Backup
Your hosting account should have enough free space. A WordPress site backup can become large. This happens when your site has many images. Videos, PDFs, and old backup files also increase size. WooCommerce websites may also have more data.
Prepare a Remote Storage Account for Better Safety
A good WordPress backup solution should not depend only on hosting. If your server goes down, local backups may also be lost. This is why remote storage is important. It keeps a copy away from your website server.
Understand What a Full WordPress Backup Includes
A full WordPress backup includes two main parts. The first part is website files. These files include themes, plugins, uploads, and media files. The second part is the database. The database stores posts, pages, comments, users, settings, and orders.
Keep Your Website Stable Before Starting the Backup
Try to create backups when your website is stable. Avoid running backups during major updates. Do not make design changes during the backup process. Also avoid high-traffic hours if possible. Backups use server resources, especially on large websites.
How to Backup WordPress Using UpdraftPlus (Step By Step)
Step 1: Install the UpdraftPlus Plugin on Your WordPress Website
- Log in to your WordPress admin dashboard.
- Go to Plugins > Add New from the left menu.
- Type UpdraftPlus in the plugin search box.
- Find the UpdraftPlus WordPress Backup Plugin.
- Click the Install Now button.
- Wait until WordPress installs the plugin.
- Click Activate after the installation finishes.
- Your WordPress backup plugin is now ready to use.
Step 2: Open the UpdraftPlus Backup Settings Page
- Go to your WordPress dashboard menu.
- Click Settings > UpdraftPlus Backups.
- This page manages your full WordPress backup process.
- You can create manual backups from this page.
- You can also set automatic backup schedules here.
- Beginners can manage backups from one simple screen.
Step 3: Click the Backup Now Button
- Click the Backup Now button on the UpdraftPlus page.
- A popup box will appear with backup options.
- Keep the database backup option selected.
- Keep the website files backup option selected.
- These options help create a complete WordPress site backup.
- The database stores posts, pages, users, and settings.
- Website files include themes, plugins, uploads, and media.
Step 4: Select Both Files and Database for Full Backup
- Always select both files and database before backup.
- A full backup needs both website parts.
- Files include themes, plugins, images, and uploads.
- The database includes content, comments, users, and settings.
- If you skip files, images may not be restored.
- If you skip the database, content may not restore.
- This makes your UpdraftPlus backup more complete and safe.
Step 5: Start the Backup Process Safely
- Check your selected backup options again.
- Click Backup Now to start the process.
- UpdraftPlus will begin creating backup files.
- Do not close your browser during backup.
- Wait until the backup process completes fully.
- Small websites may finish within a few minutes.
- Large websites may take more time to finish.
- A success message will appear after completion.
Step 6: Check Your Backup Files After Completion
- Scroll down to the Existing Backups section.
- Check if your new backup appears there.
- You should see different backup file parts.
- These may include databases, plugins, themes, and uploads.
- This confirms the backup was created successfully.
- Always check this section after every backup.
- It helps confirm your WordPress backup solution is working.
Step 7: Download the Backup Files to Your Computer
- Click each backup file part one by one.
- Download the files to your computer.
- Save them in a safe and clear folder.
- Keep the folder name easy to understand.
- Do not delete these files too quickly.
- This gives you another backup copy outside WordPress.
- It adds extra safety during hosting problems.
Step 8: Connect Remote Storage for Extra Protection
- A local backup stays on your website server.
- This can be risky if the server fails.
- Go to the Settings tab in UpdraftPlus.
- Choose a remote storage option.
- You can select Google Drive, Dropbox, Amazon S3, or FTP.
- Google Drive is usually simple for beginners.
- Follow the connection steps shown on screen.
- Save your settings after connecting remote storage.
Step 9: Set an Automatic Backup Schedule
- Go to the Settings tab again.
- Choose how often files should be backed up.
- Choose how often the database should be backed up.
- A simple blog may need weekly backups.
- A business website may need daily database backups.
- A WooCommerce store may need more frequent backups.
- Automatic backups help protect your website regularly.
- Save your schedule settings after selecting them.
Step 10: Save Settings and Run One Test Backup
- Click Save Changes after setting storage and schedule.
- Run one manual backup to test the setup.
- Check the Existing Backups section after completion.
- Confirm that the backup files are visible.
- Open your remote storage account.
- Check if the backup appears there.
- If it appears, your backup setup is working properly.
Step 11: Restore the Backup Only When Needed
- Go to Settings > UpdraftPlus Backups.
- Find your backup under Existing Backups.
- Click the Restore button.
- Select the parts you want to restore.
- For a full restore, select files and database.
- Wait until the restore process finishes.
- Check your website pages after restoration.
- Also test forms, login, dashboard, and checkout.
Step 12: Keep Your Backup Plan Updated
- Do not treat backup as a one-time task.
- Keep your automatic backup schedule active.
- Check backup files from time to time.
- Remove very old backups when storage becomes full.
- Create a manual backup before major updates.
- Store backup copies in more than one place.
- This habit helps protect your full WordPress website.
Common UpdraftPlus Backup Problems and Easy Fixes
UpdraftPlus is a helpful WordPress backup plugin. Still, beginners may face some backup issues. These problems can happen because of large files, weak hosting, wrong settings, or storage errors. A good WordPress backup solution should be checked often to keep your website safe.
Backup Gets Stuck During the Process
An UpdraftPlus backup may stop when the website is large. Low hosting resources can also cause this issue. To fix it, remove old backups, clear cache files, and delete unused media. If the problem continues, ask your hosting provider to check server limits.
Remote Storage Does Not Connect
Remote storage keeps your WordPress site backup safer. Sometimes Google Drive or Dropbox may not connect properly. To fix this, reconnect your storage account. Then save the settings and run one test backup.
Backup File Is Too Large
Large images, videos, and unused files can increase backup size. This may slow or stop the WordPress backup process. Remove unused plugins, themes, and media files. Also delete old backup files from your hosting account.
Scheduled Backup Does Not Run
Automatic backups may fail because of WordPress cron issues. First, check your UpdraftPlus schedule settings. Make sure file and database backup schedules are saved. If it still fails, contact hosting support.
Restore Fails During Recovery
Restore may fail if backup files are incomplete. It can also fail because of low server limits. Check all backup files before restoring. If possible, test the backup on a staging site first.
Conclusion
A regular WordPress backup keeps your website safer from errors, failed updates, hacking, and data loss. UpdraftPlus makes this process easier for beginners. You can create a manual backup, schedule automatic backups, and store files in remote storage. Always include both website files and database in your backup. This helps restore your website properly when something goes wrong. Also, check your backup files from time to time. A backup is useful only when it is complete and ready to restore.
If you are not sure how to create, check, or restore a backup, you can contact WP Chat Support for WordPress help. Their website lists support for WordPress backup, restore, website errors, plugin issues, WooCommerce problems, and maintenance. You can call them at +1 888 602 0119 for support.

James is an experienced WordPress and WooCommerce specialist with over 10 years of practical experience. At WPChatSupport, he creates clear guides that help website owners fix WordPress issues, improve speed, secure their sites, and manage WooCommerce stores with confidence. His expertise includes store setup, plugin configuration, theme customization, payment gateway integration, and website troubleshooting. Through simple and helpful content, James supports users in solving technical problems and following best practices for online business growth.