Introduction
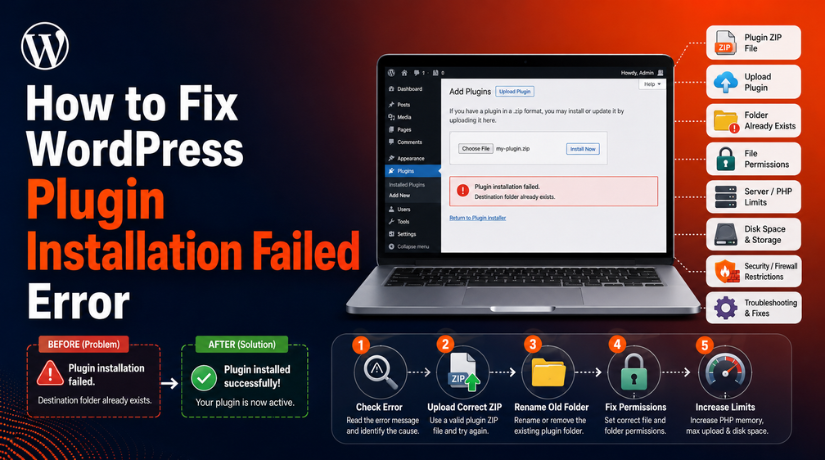
WordPress plugins help you add useful features to your website. You can use plugins for SEO, security, forms, backups, speed, design, and online stores. Most users install plugins from the WordPress dashboard with one click. But sometimes, the plugin does not install properly. You may see a message like WordPress plugin installation failed or WordPress plugin install error. This issue can feel confusing, especially for beginners.
The error may appear while installing a free plugin. It may also happen when uploading a premium plugin ZIP file. In some cases, WordPress shows the error during a plugin update. You may also see messages like WordPress plugin upload failed, “Destination folder already exists,” or “No valid plugins were found.” These messages show that WordPress could not complete the installation process.
This guide will help you understand the main causes first. Once you know the reason, you can fix the issue safely. Before making any changes, always check the exact error message. It can help you choose the right solution faster. This article will explain why a plugin fails, what mistakes to avoid, and how to fix WordPress plugin installation errors step by step.
Why WordPress Plugin Installation Failed Error Happens On Website
A WordPress plugin installation error can happen for many reasons. Below are the most common reasons behind this error.
Wrong Plugin ZIP File Can Stop WordPress Plugin Installation
A wrong ZIP file is a common cause of this issue. This mostly happens with premium plugins. Many premium plugin downloads come inside a large ZIP package. That package may include documents, license files, demo content, and another plugin ZIP file. If you upload the full package, WordPress may reject it.
Existing Plugin Folder Can Cause Destination Folder Already Exists Error
Sometimes, the plugin folder already exists on your website. This can happen after a failed installation or failed update. It can also happen when a plugin was deleted incorrectly. WordPress checks the plugin folder before installing a new plugin. If the same folder name already exists, WordPress stops the process.
File Permission Problems Can Make WordPress Plugin Not Installing
File permission issues can also block plugin installation. WordPress needs permission to create folders and copy plugin files. If your server does not allow this action, the plugin will fail. You may see errors like “Could not create directory” or “Could not copy file.”
Low Upload Limit or Server Timeout Can Break Plugin Uploads
Some plugins are larger than the server upload limit. This often happens with page builders, backup plugins, and WooCommerce extensions. If your hosting upload limit is too low, the upload may fail. WordPress may show “The link you followed has expired.”
Low Hosting Disk Space Can Stop New Plugin Files
Your hosting account needs free space for plugin installation. WordPress first uploads the plugin ZIP file. Then it extracts the files and saves them inside the plugin folder. If your hosting storage is full, this process cannot finish.
Outdated WordPress or PHP Version Can Create Compatibility Issues
Some plugins need a modern WordPress or PHP version. If your website uses old software, the plugin may not install. It may also install but fail during activation. This is common with newer plugins and premium tools.
Security Plugin or Firewall May Block Plugin Installation
Security tools can sometimes block plugin uploads. A WordPress security plugin, server firewall, or hosting rule may stop the upload. It may happen when the file looks risky or too large. Some hosting firewalls also block ZIP uploads for safety reasons.
WordPress.org Connection Issue Can Cause Download Failed Error
Free plugins are downloaded from the WordPress.org plugin directory. If your server cannot connect to WordPress.org, installation may fail. You may see a “Download failed” message in your dashboard.
Precautions Before You Start Fixing the WordPress Plugin Installation Failed Error
Before you fix a WordPress plugin installation failed error, take a few safety steps. These steps protect your website from bigger problems. Many users start deleting files too quickly. This can break the website or remove important plugin data. A careful approach helps you fix the issue safely.
Take a Full Website Backup Before Making Any Changes
A full backup is the first important step. It helps you restore your website if anything goes wrong. You should back up your website files and database. Also include themes, plugins, media files, and important settings. This is very important for business websites and WooCommerce stores. A plugin issue may look small at first.
Use a Staging Website to Test the Plugin Safely
A staging website is a copy of your live website. It lets you test changes without affecting visitors. You can install the plugin on staging first. If the plugin works there, you can continue safely. This is useful when you are unable to install WordPress plugin on a live site. It also helps you test plugin conflicts, server limits, and theme issues.
Note the Exact Error Message Shown in WordPress
Do not ignore the exact error message. It tells you where the problem may exist. For example, “Destination folder already exists” means an old plugin folder may remain. “Could not create directory” usually means a permission issue. “No valid plugins were found” often means the wrong ZIP file was uploaded. If you see WordPress plugin upload failed, the problem may be upload size or server timeout.
Download Plugins Only From Trusted and Official Sources
Always check the plugin source before installing it. Use the WordPress Plugin Directory, official developer websites, or trusted marketplaces. Avoid nulled, cracked, or unknown plugin files. These files may contain malware or broken code. They can also cause the WordPress plugin not to install again.
Keep Hosting Login and File Access Details Ready
Some fixes need hosting access. Keep your cPanel, File Manager, FTP, or SFTP details ready. You may need to check plugin folders, file permissions, or disk space. If you cannot access hosting files, contact your hosting provider. Good access helps you fix WordPress plugin installation errors faster and more safely.
Avoid Editing or Deleting Unknown Website Files
Never delete unknown files without checking them first. WordPress has many important folders and core files. Removing the wrong file can create errors. If you are unsure, rename the folder instead of deleting it. You can also ask a WordPress expert for help before making changes.
Step By Step Guide to Fix WordPress Plugin Installation Failed Issues
A WordPress plugin installation error can happen for different reasons. So, do not try random fixes first. Start by checking the exact error message. This will help you find the right solution. Follow these simple steps one by one to fix the issue safely.
Step 1: Check the Exact Plugin Installation Error Message
- First, read the error message shown on your screen.
- The message tells you what went wrong during installation.
- Take a screenshot or copy the error message.
- This helps you choose the correct fix.
- Do not start deleting files without checking the message.
- If you see a WordPress plugin install error, compare it with common errors.
- This step saves time and avoids wrong changes.
- It also helps you fix the correct problem first.
| Error Message | Meaning | Simple Fix |
| Destination folder already exists | Old plugin folder is present | Rename or delete old folder |
| Could not create directory | Permission issue | Fix folder permissions |
| Could not copy file | Server cannot save files | Check permissions and space |
| No valid plugins were found | Wrong ZIP file uploaded | Upload correct plugin ZIP |
| The link you followed has expired | Upload limit is low | Increase upload limit |
| Download failed | Server connection issue | Try manual installation |
Step 2: Upload the Correct Plugin ZIP File
- Download the plugin again from the official source.
- Open the downloaded ZIP file on your computer.
- Check if the file includes documents or license files.
- Look for another ZIP file inside the main package.
- That inner ZIP is often the real plugin file.
- Go to your WordPress dashboard.
- Click Plugins and then click Add New.
- Click Upload Plugin. Choose the correct plugin ZIP file.
- Click Install Now to start installation.
- This can fix the WordPress plugin upload failed issue.
- Avoid uploading the full documentation package.
Step 3: Rename the Old Plugin Folder
- Use this step if you see “Destination folder already exists.”
- This means the old plugin folder is already present.
- Log in to your hosting account.
- Open cPanel or File Manager.
- Go to your WordPress root folder.
- Open the wp-content folder.
- Now open the plugins folder.
- Find the old plugin folder. Rename it, such as plugin-name-old.
- Go back to the WordPress dashboard.
- Try installing the plugin again.
- Rename the folder first instead of deleting it.
- This is safer if you need to restore it later.
Step 4: Check File and Folder Permissions
- WordPress needs permission to create plugin files.
- It also needs permission to save plugin folders.
- If permissions are wrong, installation can fail.
- You may see “Could not create directory.”
- You may also see “Could not copy file.”
- Open your hosting File Manager.
- Go to the wp-content folder. Find the plugins folder.
- Check the folder permission.
- Common safe folder permission is 755.
- Common safe file permission is 644.
- Do not set folders or files to 777.
- This can make your website unsafe.
- If the error continues, contact hosting support.
- Ask them to check file ownership also.
Step 5: Increase Upload Limit and PHP Limits
- Large plugin files may fail during upload.
- This can show “The link you followed has expired.”
- It can also show WordPress plugin upload failed.
- Log in to your hosting control panel.
- Open PHP Settings or MultiPHP INI Editor.
- Increase the upload size limit.
- Increase the post size limit. Increase the memory limit.
- Increase the execution time if needed.
- Save the changes.
- Try uploading the plugin again.
- If you cannot change these settings, contact hosting support.
- Ask them to increase the PHP limits for you.
Step 6: Check Hosting Disk Space
- WordPress needs free space to install plugins.
- It uploads the plugin ZIP file first.
- Then it extracts and saves the plugin files.
- If hosting space is full, installation can fail.
- Log in to your hosting account. Check your disk usage.
- Delete old backups if they are not needed.
- Remove unused ZIP files from the server.
- Clear large error logs only if safe.
- Delete unused plugins and themes.
- Do not delete unknown files or folders.
- After clearing space, try installing the plugin again.
Step 7: Update WordPress, PHP, Theme, and Existing Plugins
- Old software can create plugin compatibility issues.
- This can make your WordPress plugin not install properly.
- Take a full website backup before updates.
- Update WordPress core from the dashboard.
- Update your active theme if an update is available.
- Update existing plugins one by one.
- Check your PHP version from hosting settings.
- Use a supported PHP version for better performance.
- After updates, try installing the plugin again.
- If the plugin still fails, check its requirements.
- Some plugins need newer WordPress or PHP versions.
If you are still unable to install the WordPress plugin, contact support. A server issue may be blocking the installation. Hosting support can check firewall, ownership, and PHP settings. A WordPress expert can also help you fix WordPress plugin installation errors.
How to Prevent WordPress Plugin Installation Failed Errors in the Future
You can prevent many plugin errors with regular website care. A small maintenance routine keeps WordPress clean, safe, and stable. It also reduces future WordPress plugin install error problems.
Keep WordPress Updated for Better Plugin Compatibility
- Always keep WordPress updated.
- Updates improve security and plugin support.
- Use the latest stable version when possible.
- Take a backup before every major update.
- Check your website after completing updates.
Use Trusted Plugins From Safe and Official Sources Only
- Download plugins from trusted sources only.
- Use the WordPress Plugin Directory when possible.
- Use official developer websites for premium plugins.
- Avoid nulled, cracked, or unknown plugin files.
- Unsafe plugins can contain malware or broken code.
- They may cause the WordPress plugin installation to fail.
Check Plugin Details Before Installing Any New Plugin
- Check when the plugin was last updated.
- Check if it supports your WordPress version.
- Check the plugin’s PHP requirement.
- Read user reviews before installing.
- Check active installations and support activity.
- Avoid plugins with poor support or old code.
- This helps prevent WordPress plugin not installing problems.
Keep Enough Hosting Space for Plugin Uploads
- Check your hosting storage often.
- Delete old backups when not needed.
- Remove unused ZIP files from the server.
- Delete unused themes and plugins.
- Clear large error logs only if safe.
- Enough free space helps WordPress install plugins smoothly.
Test New Plugins on a Staging Website First
- Use staging before installing major plugins.
- Test the plugin away from the live site.
- Check if it creates any errors.
- Check if it affects design or speed.
- Move it to the live site after testing.
- This is useful for WooCommerce and business websites.
Keep Regular Backups for Quick Website Recovery
- Keep regular backups of your website.
- Include files, database, themes, and plugins.
- Store backups in a safe location.
- Use backups before updates or new plugin installs.
- Backups help restore your website quickly.
- This reduces stress during plugin errors.
Conclusion
WordPress plugin installation failed error can happen for many reasons. It may come from a wrong ZIP file, an old plugin folder, low upload limits, file permission issues, or server restrictions. The best way to fix it is to check the exact error message first. Then follow the right step based on that message. You can upload the correct plugin ZIP, rename the old plugin folder, check permissions, increase PHP limits, clear disk space, or install the plugin manually.
Regular updates, trusted plugins, safe file permissions, staging tests, and website backups can help prevent this issue in the future. If the issue continues, it may need a deeper server or WordPress check. WP Chat Support provides WordPress and WooCommerce support, including plugin support, error fixing, backups, security help, and maintenance. For more details, visit WP Chat Support or call +1 888 602 0119 for WordPress support information.
James is an experienced WordPress and WooCommerce specialist with over 10 years of practical experience. At WPChatSupport, he creates clear guides that help website owners fix WordPress issues, improve speed, secure their sites, and manage WooCommerce stores with confidence. His expertise includes store setup, plugin configuration, theme customization, payment gateway integration, and website troubleshooting. Through simple and helpful content, James supports users in solving technical problems and following best practices for online business growth.