Introduction
You edit your CSS. You save it. You reload the page. Nothing changes. This is one of the most common and most annoying WordPress problems. It makes you feel like the code is broken, even when the code is fine.
In most cases the new CSS is saved correctly. Something between your edit and your screen is still serving the old version. That something might be your browser, a caching plugin, a CDN, or an optimization setting. Sometimes the CSS never loads at all because it was saved in the wrong place.
The trouble often starts after a change. You may have updated a theme, edited a template, installed a speed plugin, or switched on a CDN. Any of these can freeze an old stylesheet in place. Your store or blog then looks wrong, and visitors see a design you thought you had fixed.
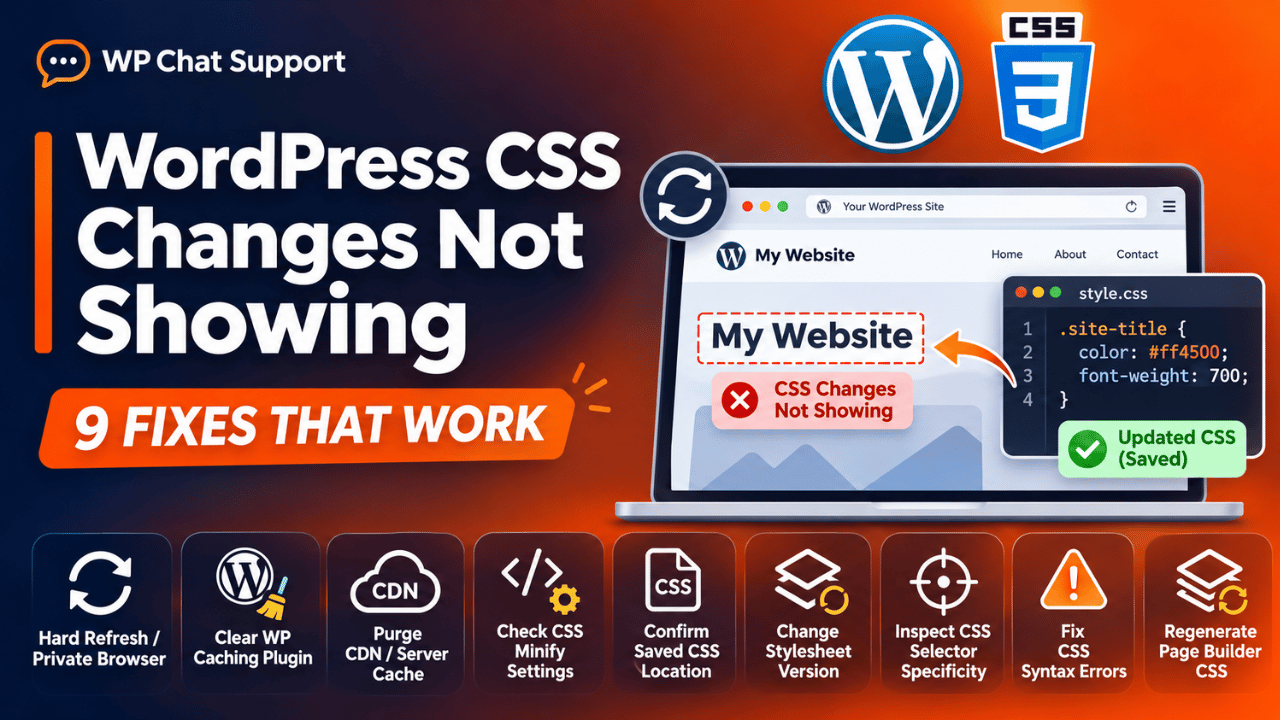
This guide shows you how to find the real cause and fix it. You will learn the signs, the causes, and nine fix steps. Each step tells you how to check if it applies to you before you change anything. At the end you will find habits that keep the problem from coming back. If your site also shows other missing content, you may like our guide on fixing a WordPress theme that will not update.
Signs That Show WordPress CSS Changes Are Not Showing
The main sign is simple. You change a colour, a font size, or a margin, and the page looks the same. But there are other clues that help you tell this problem from a similar one.
First, check if the change shows in a different browser. If a private window shows the new design and your normal window does not, the old CSS is cached in your browser. If every browser still shows the old look, the cache is on the site or server side.
Second, check if the change shows when you are logged out. Many caching plugins skip the cache for logged-in users. So you may see the new CSS in the dashboard preview but not on the public page. Visitors would then see the old design while you think all is well.
Third, compare desktop and mobile. Some plugins build separate cached files for mobile visitors. One device may show the fix while the other does not. Also watch for a half-changed page. If only some of your rules take effect, the cause is usually specificity or a syntax error, not caching.
Fourth, look at the page source. Open the page, view the source, and search for your stylesheet name. If the link has an old version number at the end, the browser may keep using the old file. If your stylesheet is missing from the page completely, it never loaded.
Reasons Why WordPress CSS Changes Are Not Showing
Each cause below matches one fix step later in this guide. Read them first. Then you can jump straight to the step that fits your site.
Browser cache is the most common cause. Your browser saves CSS files so pages load faster. If the file name stays the same, the browser may keep using its saved copy and never ask the server for the new one. The result is an old design on your screen even though the server has the new file.
A caching plugin can serve old pages. These plugins save a finished copy of each page as plain HTML. That saved copy points to the CSS file that existed when the copy was made. Until you clear the cache, visitors get the old copy. Some plugins also save the CSS files themselves.
A CDN or server cache sits between your site and the visitor. A CDN stores copies of your files on servers around the world. Your host may also run a cache at the server level. If either one keeps the old stylesheet, your edit on WordPress never reaches the visitor.
Optimization settings can lock in old CSS. Many speed plugins combine, minify, or delay CSS files. Some also build a small set of critical CSS for the top of the page. These files are made once and reused. Your new rules do not appear until the plugin builds them again.
You may have saved the CSS in the wrong place. WordPress lets you add CSS in several spots. These include the Customizer, the site editor, a child theme, a parent theme, a page builder, and a plugin. If you edit the parent theme file but the child theme loads, nothing changes. If you never press Publish in the Customizer, the CSS stays a draft. A theme update can also overwrite edits made inside the theme folder.
The stylesheet link may not change when the file changes. WordPress adds a version number to a stylesheet link when a theme or plugin loads it correctly. If that number never changes, browsers and CDNs see the same address and reuse the old file. This happens when a developer hard-codes the version.
Another rule may be winning. CSS follows strict rules about which declaration applies when two collide. A more specific selector beats a less specific one. A rule that loads later beats an earlier rule with the same weight. Your new CSS may load fine but lose the fight.
A syntax error can break the rules after it. A missing closing brace, a stray character, or a missing semicolon can make the browser skip your rule and some rules that follow. The CSS is saved, but the browser ignores part of it.
A page builder may keep its own CSS files. Builders such as Elementor build CSS files for each page and reuse them. If your edit changes layout settings but the builder keeps an old file, the page shows the old styles until the builder makes fresh files.
How to Fix WordPress CSS Changes Not Showing (Step by Step)
Work through these steps in order. They run from the safest and quickest check to the deepest. After each step, reload the page and look for your change. If it appears, you can stop. If it does not, move to the next step. Steps that touch files or settings tell you to take a backup first.
Step 1: Hard Refresh and Test in a Private Window
This step fixes the browser cache cause. Your browser may be showing a saved copy of the stylesheet. Before you change anything, test it. Open the same page in a private or incognito window. Private windows start with no saved files for your site.
If the private window shows your new CSS and the normal window does not, you have confirmed the cause. If both windows look the same, the cause is not your browser, so move on to Step 2.
To fix it, go back to the normal window and do a hard refresh. On Windows and Linux, press Ctrl and Shift and R together. On a Mac, press Command and Shift and R. This tells the browser to download the page and its files again. You can also clear cached images and files from the browser settings.
To verify, reload the page and look for your change. For a stronger test, open the browser developer tools, go to the Network tab, tick the box named Disable cache, and reload with the tools open. If the change shows now, the browser cache was the cause. If not, continue to Step 2.
Step 2: Clear Your Caching Plugin and Site Cache
This step fixes the caching plugin cause. Your plugin may be handing out an old saved copy of each page. To check, look at the plugin list in your dashboard. Names such as WP Rocket, LiteSpeed Cache, W3 Total Cache, WP Super Cache, and WP Fastest Cache all store pages. If you see one of these, it is a likely suspect.
Another quick check is to log out and view the page. If the page looks old when logged out and new when logged in, the plugin is skipping the cache for you but serving it to visitors. That points straight at the cache.
To fix it, open the plugin settings or the plugin menu in the top admin bar. Look for a button such as Clear cache, Purge all, or Delete cache. Click it. If the plugin has a separate option to remove minified or combined CSS files, clear that too. Many hosts also add their own cache button in the dashboard, so use it if you see one.
To verify, open the page in a private window and reload. If your change shows, the cache was the cause. If you still see the old design, the cache may sit outside WordPress, so move on to Step 3.
Step 3: Purge the CDN and Server Cache
This step fixes the CDN and server cache cause. The old file may live outside your WordPress site. To check, ask yourself if you use Cloudflare, BunnyCDN, or a similar service, or if your host offers a cache feature. If you do, the old copy may be stored there.
You can also test by opening the stylesheet address in the browser. Find the address in the page source, paste it into a new tab, and look for your new rules. If the file still has the old code, the file on the CDN or server is stale. If it has the new code, the cache is not the cause.
To fix it, log in to your CDN dashboard and use its purge option. In Cloudflare, open the Caching section and choose Purge Everything, or purge just the stylesheet address. Then clear any cache feature in your host control panel, such as a server cache, an object cache, or a proxy cache.
Purging a CDN is safe, but it can slow your site for a few minutes while the files are rebuilt. To verify, open the stylesheet address again and confirm the new code is there. Then reload the page in a private window. If the change still does not show, go to Step 4.
Step 4: Pause CSS Minify, Combine, and Unused-CSS Settings
This step fixes the optimization setting cause. Speed plugins can freeze CSS into one combined or delayed file. To check, open your speed plugin settings and look for options named Minify CSS, Combine CSS, Remove Unused CSS, Critical CSS, or Delay CSS. If any are on, your new rules may be hidden by an old generated file.
A good test is to look at the page source. If your stylesheet link points to a cache folder with a long random name, instead of your theme folder, the plugin is serving a generated copy.
To fix it, first take a backup, or test on a staging copy of your site. Changing optimization settings can break the layout on some sites. Then turn off the CSS options one at a time. Save, clear the cache, and reload. If the new CSS appears after you switch off one option, that option was the cause.
Most plugins also have a button to rebuild the generated CSS. Use it after the change. Once your edit shows, turn the options back on and rebuild the files again. Test the page once more to make sure the new rules still show.
To verify, view the page in a private window and compare it with your edit. If nothing changes even with all optimization off, go to Step 5.
Step 5: Confirm Your CSS Is Saved in the Right Place
This step fixes the wrong-place cause. Your CSS may be saved, but the site may never load it. To check, find where you added the code. Then confirm that this spot belongs to the theme that is active on your site.
Open the dashboard and look at the active theme under the appearance menu. If a child theme is active, edits in the parent theme folder will not load for the child in the way you expect. Also, edits made inside any theme folder are lost when that theme updates.
The page source gives a clear answer. Search it for a unique word from your CSS, such as a class name you added. If the word appears in a style block or a linked file, the CSS is loading. If it does not appear anywhere, the code is in the wrong place or unpublished.
To fix it, use a safe home for custom CSS. The Customizer has an Additional CSS panel under the appearance menu. Changes show in the preview, and you must press Publish to make them live. The WordPress documentation notes that this CSS is stored outside the theme files, so it survives theme updates. Block themes may hide the Customizer. In that case, look for the styles panel in the site editor, which has a place for additional CSS in recent versions. A child theme stylesheet is another solid choice.
If you must edit theme files, take a full backup first and use a child theme. Never edit the parent theme on a live site without a backup. To verify, press Publish or save, then reload in a private window and search the source again. If your class name appears and the style still fails, move on to Step 6.
Step 6: Make the Stylesheet Address Change When the File Changes
This step fixes the stale version cause. A stylesheet that keeps the same address can be cached for a long time. To check, view the page source and find the link to your stylesheet. Look at the number after the question mark in the address. If you edited the file but the number is the same, the address did not change.
WordPress adds a version to a stylesheet when a theme or plugin loads it with the proper function. The developer documentation explains that the version becomes part of the address, so a new version makes the browser fetch a new file. If the version is false, WordPress uses its own version number. If it is null, no number is added at all. Neither one helps your own edits.
To fix it, you need to edit the code that loads your stylesheet, usually in a child theme. Take a backup first, because a code mistake can take the site offline. Set the version to the file modification time, which changes each time you save the file. A short example looks like this:
wp_enqueue_style(
  'child-style',
  get_stylesheet_directory_uri() . '/style.css',
  array(),
  filemtime( get_stylesheet_directory() . '/style.css' )
);
Do not use the current time on every request. The documentation warns that this defeats caching. If you are not comfortable with code, ask your developer to do this. To verify, save the file, reload the page, view the source, and check that the number after the question mark has changed. Then check if your change shows.
Step 7: Fix Specificity and Load Order With Developer Tools
This step fixes the losing-rule cause. Your CSS may be loading, but another rule may win. To check, right-click the element you want to change and choose Inspect. The Styles panel lists every rule that applies. Your rule will be shown with a line through it if another rule beat it.
If your rule is struck through, look at the rule above it. Note the selector and which file it comes from. If it comes from your theme or a plugin, that rule is more specific or loads later. If your rule does not appear in the list at all, go back to Step 5, because it is not loading.
To fix it, make your selector a little more specific. For example, change a bare class into a class inside a parent container. You can also move your CSS to load later, which a child theme or the Additional CSS panel usually does. Use the important flag only as a last resort. It forces a rule to win, but it makes later edits harder.
Make changes in small steps and test each one. To verify, inspect the element again. Your rule should now be active and not struck through. If the rule still does not apply, check Step 8 for errors.
Step 8: Check Your CSS for Syntax Errors
This step fixes the broken-code cause. One small typing mistake can make the browser ignore a rule. To check, look at your CSS for a missing closing brace, a missing semicolon, or a stray character. Developer tools help here. In the Styles panel, a faulty line is often shown with a warning mark or with a line through it.
A missing brace is the worst case. The browser may treat the next rule as part of the broken one, so several later rules fail together. If your top rules work and everything after one point fails, look for an error at that point.
To fix it, copy your CSS into a free online CSS validator, or read it line by line. Fix any missing brace, colon, or semicolon. Check that each property name is spelled correctly. Also check that quotes and brackets are closed. If you edit a file on the server, take a backup first, and keep a copy of the old file.
To verify, reload the page in a private window and inspect the element again. Rules that failed before should now apply. If your changes still do not show, and you use a page builder, go to Step 9.
Step 9: Regenerate Page Builder CSS Files
This step fixes the page builder file cause. Page builders keep their own style files. To check, see if your site uses Elementor, Divi, Beaver Builder, or a similar tool. Then see if the old design shows only on pages made with the builder. If other pages show your edit, the builder is the likely cause.
The page source also helps. Builder CSS files often have the builder name in the address. If that file is old or missing your rules, it needs to be rebuilt.
To fix it, open the builder settings and look for a tool that clears or regenerates CSS files. In Elementor, the Tools screen has a button that regenerates or clears its CSS files and data. Other builders have a similar option in their settings. Click it, then clear your site cache again from Step 2. Take a backup first if you plan to change builder settings beyond this button.
Builder cache and global styles can also differ from page styles. If a global setting overrides your page edit, change the global setting instead. To verify, reload the page in a private window. Your change should show now. If it still does not, ask your host to check server-level caching, and share what you found in the steps above. You can also read our guide on fixing the WordPress Customizer when it stops working.
Best Practices to Prevent WordPress CSS Changes Not Showing in Future
Most causes above come back when you work without a routine. A few habits stop them. Each habit ties back to a cause you read about earlier.
Always test edits on a staging site first. A staging copy lets you try CSS, caching settings, and optimization options without risk. If a change breaks the layout, your live visitors never see it. Take a full backup before any change on the live site. Our guide on backing up WordPress with UpdraftPlus shows an easy way to do this.
Keep all custom CSS in one safe place. Use a child theme or the Additional CSS panel. This stops edits from being lost during a theme update and avoids confusion about where the CSS lives. Write a short note on where each custom style sits.
Use file-based versioning. If a developer loads your stylesheet, ask for the file modification time as the version. Then every edit gets a new address, and browsers, CDNs, and caches fetch the new file by themselves.
Clear caches in a set order after any CSS edit. Start with the plugin cache, then the CDN, then the server cache. Make it a habit. Also rebuild minified and combined CSS after changes. Keep your speed settings simple. Turn on one optimization at a time and test the page after each one.
Check CSS for errors before you save. Use developer tools to test a rule on the live page before you copy it into your files. Keep plugins, themes, and PHP up to date, and test plugin updates on staging. If a plugin update fails, our guide on fixing a WordPress plugin update that failed can help. Finally, if a conflict between plugins hides your styles, our guide on finding a WordPress plugin conflict shows how to track it down.
Conclusion
When WordPress CSS changes do not show, the CSS is rarely the problem. The usual signs are an old design on your screen, a different look in a private window, or a change that works only when you are logged in. These point to a cache or a file that did not update.
The main causes are the browser cache, caching plugins, CDN and server caches, optimization settings, CSS saved in the wrong place, a stylesheet address that never changes, losing rules, syntax errors, and page builder files. Each one has a fix in this guide.
The fix process runs from simple to deep. Start with a hard refresh and a private window. Then clear plugin, CDN, and server caches. Pause optimization, confirm where your CSS is saved, fix versioning, check rule strength, look for errors, and rebuild builder files. Always take a backup before touching files or settings that can break the site.
To keep the problem away, use staging, keep your CSS in one safe place, use file-based versions, clear caches in a set order, and keep your software up to date. With these habits, your next edit will show up when you save it.

James is an experienced WordPress and WooCommerce specialist with over 10 years of practical experience. At WPChatSupport, he creates clear guides that help website owners fix WordPress issues, improve speed, secure their sites, and manage WooCommerce stores with confidence. His expertise includes store setup, plugin configuration, theme customization, payment gateway integration, and website troubleshooting. Through simple and helpful content, James supports users in solving technical problems and following best practices for online business growth.