Introduction
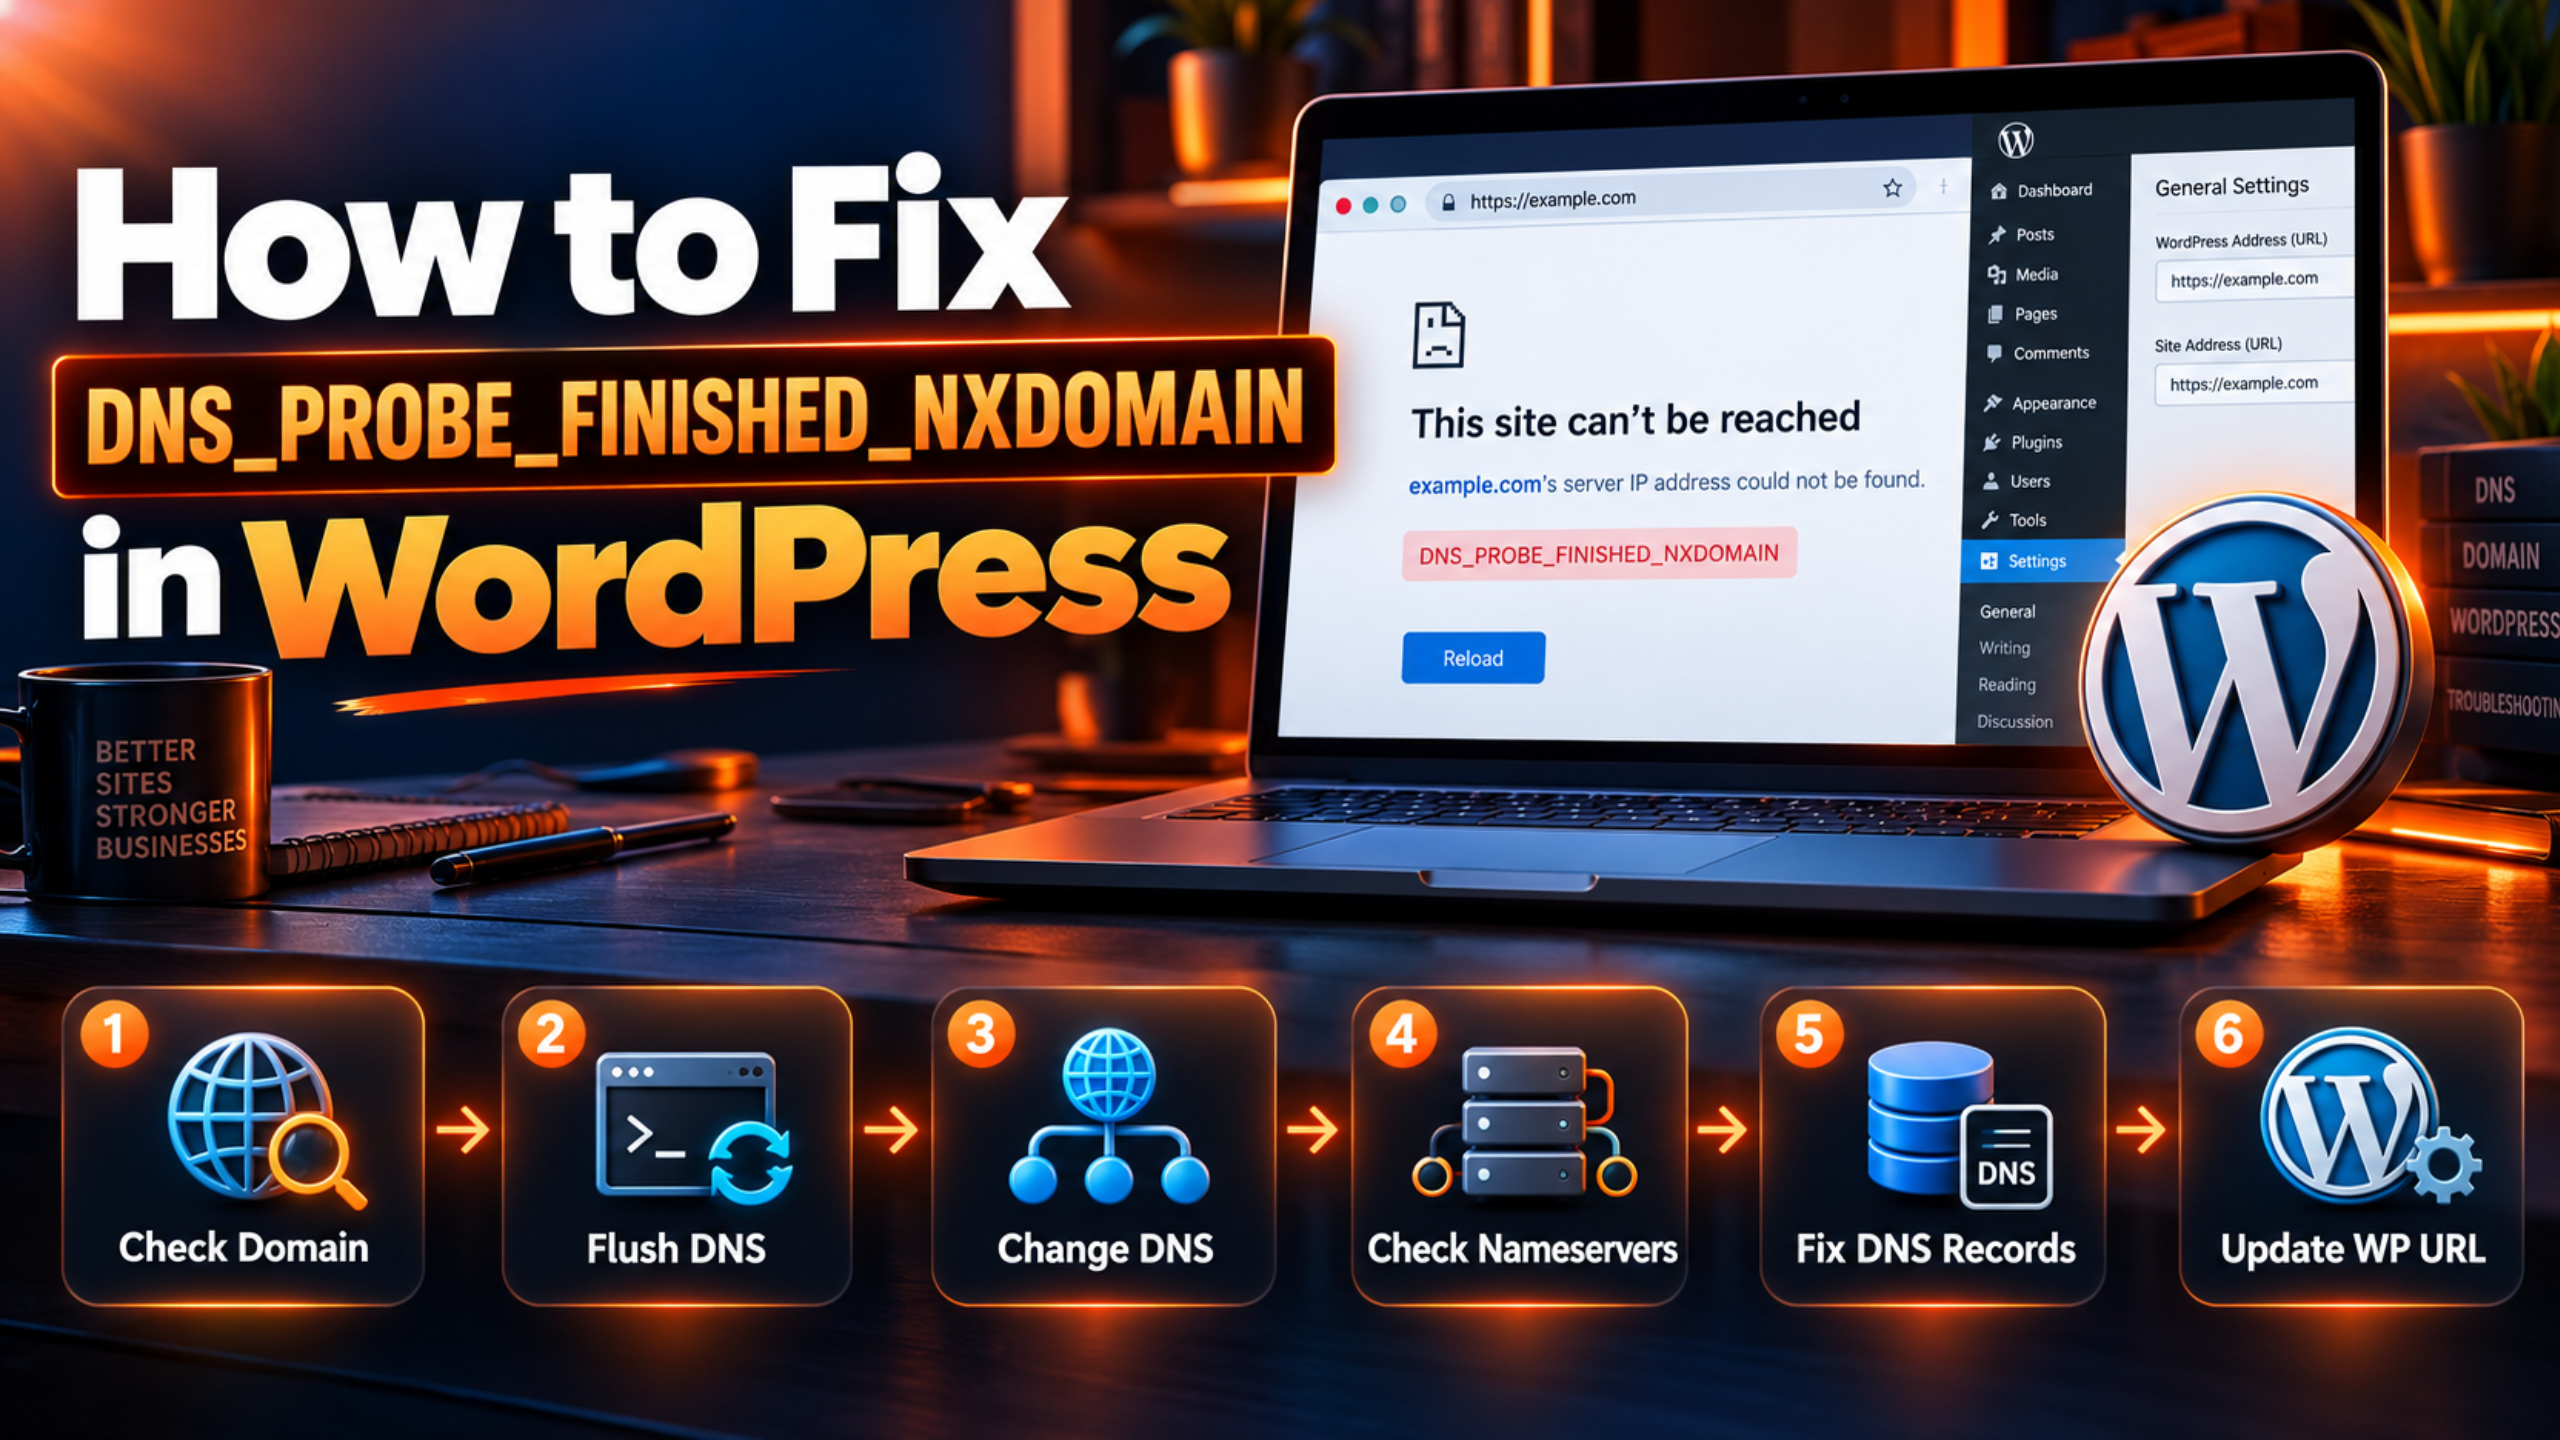
You open your website and Chrome shows a plain error page. It says “This site can’t be reached” and “server IP address could not be found.” Underneath sits the code DNS_PROBE_FINISHED_NXDOMAIN. Your site looks gone, yet nothing seems to have changed.
The code is shorter than it looks. DNS is the phone book of the internet. It turns your domain name into the number of the server that holds your site. NXDOMAIN means “non-existent domain.” The lookup came back saying that no such name exists.
That answer can be right or wrong. Sometimes the domain has expired, or its settings point nowhere. Other times your own computer holds a bad memory of the address. Sometimes your WordPress site address is set to a name that never existed. Each of these has a different fix.
The error often follows a change. A site move, a nameserver update, a domain renewal, a new VPN, or a change to the WordPress address can all start it. This guide shows you how to confirm the problem, find the true cause, and fix it in a safe order. You will also learn how to keep it from returning. If your browser shows a different message, such as a dropped link, see our guide to fixing ERR_CONNECTION_RESET in WordPress.
Signs That Show You Have a DNS_PROBE_FINISHED_NXDOMAIN Problem
The clearest sign is the Chrome page that reads “This site can’t be reached,” followed by a line saying the server IP address could not be found. Firefox shows “Hmm. We’re having trouble finding that site.” Safari says it “can’t find the server.” All three point to a failed name lookup.
Notice how fast the error appears. A lookup failure happens at the very start, before any part of the page loads. You will see the error within a second or two. That speed separates it from a slow timeout or a reset connection.
Next, test other devices. Open your site on a phone using mobile data. If it loads there, the problem sits on your computer or home network. If it fails on every device and every network, the problem sits with your domain or its DNS settings.
Test the address in different forms. Try the version with www and the version without it. If one loads and the other fails, a DNS record is missing for the failing form. Also try a few other websites. If they all load, your internet is fine and the problem is limited to your domain.
Finally, check the admin area. If your public pages fail but a link inside the dashboard sends you to a strange address, the saved WordPress address may be wrong. These clues help you pick the right fix below.
Reasons Why DNS_PROBE_FINISHED_NXDOMAIN Happens
Every visit starts with a lookup. Your browser asks a DNS resolver for the server address that belongs to your domain. The resolver asks the domain’s nameservers. If any link in that chain fails, the answer is “no such domain.” The causes below run from simple to deep.
A Typo or a Broken Link
A wrong letter in the address sends the lookup to a name that does not exist. A broken link in an email, a social post, or a page can do the same. The error is correct in that case, because that name really is unknown.
Stale Cache on Your Device
Your browser and your operating system both remember recent lookups to save time. If your site moved servers, the saved answer may be old or empty. Your computer keeps using that memory instead of asking again. Corrupted browser data and experimental browser settings can add to the trouble.
A Faulty DNS Resolver
Your internet provider runs the resolver you use by default. If it is slow, overloaded, or out of date, it may fail to find a domain that does exist. Other people on a different provider can load your site without trouble.
A Bad Hosts File Entry
Your computer has a small file that overrides DNS for chosen names. Developers often add a line to it during a site move or test. If that line is wrong or left behind, your computer ignores the real DNS answer.
VPN, Antivirus, or Firewall Interference
A VPN uses its own DNS servers. Antivirus and firewall tools may filter lookups too. When these tools fail or flag your domain, the lookup returns nothing. The domain is fine, but your device cannot get an answer.
Expired, Suspended, or Unregistered Domain
If a domain expires, the registry may stop answering for it after a grace period. A suspended domain can also be removed from DNS. A domain with unpaid fees or unverified contact details can be put on hold. In all these cases the lookup says the name does not exist.
Wrong Nameservers
Nameservers hold the records for your domain. At your registrar, you tell the world which nameservers to ask. If they point to an old host, a closed account, or a typo, they cannot answer. This commonly happens after a site move.
Missing or Wrong DNS Records
Even with the right nameservers, the zone needs records. An A record links a name to a server address. If the record for your domain or for www is missing, the lookup finds nothing for that name. A deleted or mistyped record causes exactly this.
DNS Changes Still Spreading
After you change DNS, the update does not appear everywhere at once. Resolvers keep old answers until a timer called TTL runs out. Some places see the new setup while others still see the old one. During this time, the error can come and go.
A Wrong Site Address Saved in WordPress
WordPress stores two addresses: the one for its core files and the one visitors type. If either holds a domain that does not resolve, WordPress redirects people to a name that does not exist. This can happen after a move, a typo, or a copy from a staging site.
How to Fix DNS_PROBE_FINISHED_NXDOMAIN (Step by Step)
Work through the steps in order. The early steps are quick and low risk because they only touch your own device. The later steps change domain settings or site files, so they carry backup warnings. Test the site after each step in a private window.
Step 1: Check the Address and Test From Another Network
This step handles the “typo or broken link” cause and also tells you which group of causes applies. Read the address in the bar letter by letter. Check the ending too, such as .com versus .net. A single wrong character is enough to trigger the error.
Then type the address by hand instead of using a saved link. Try both the www and non-www forms. Load the site on your phone with mobile data turned on and Wi-Fi turned off.
If the site loads on mobile data, the problem is local, so continue with Steps 2 through 6. If it fails there too, skip to Step 7 and work through the domain steps. If a typed address works but your saved link does not, fix the link and you are done.
Step 2: Clear Browser Data and Reset Chrome Flags
This step addresses the “stale cache on your device” cause at the browser level. You can confirm it by opening the site in a private window. If it loads there but not in your normal window, your stored data is the problem.
In Chrome, open the clear browsing data screen with Ctrl+Shift+Delete on Windows or Cmd+Shift+Delete on Mac. Choose all time. Tick only “Cached images and files,” then clear. Next, type chrome://flags in the address bar and click “Reset all.” Restart the browser.
Reload the site. If it loads, you are done. If the error stays, the stale data is probably deeper in the operating system, so go to Step 3.
Step 3: Flush the DNS Cache on Your Computer
This step also targets the “stale cache” cause, this time at the system level. Confirm it if the site recently moved hosts or changed DNS. Your computer may still hold the old answer.
On Windows, open Command Prompt and run ipconfig /flushdns. If that fails, run it as administrator. For a deeper reset, run ipconfig /release, then ipconfig /flushdns, then ipconfig /renew. On a Mac, open Terminal and run sudo dscacheutil -flushcache, then sudo killall -HUP mDNSResponder. These commands only affect your computer.
Reload the site. If it works, the cache was the cause. If not, continue to Step 4.
Step 4: Switch to a Public DNS Resolver
This step fixes the “faulty DNS resolver” cause. You can confirm it if other devices on a different network load your site. It is also likely if you can load your site through a VPN but not directly.
Write down your current DNS settings first so you can restore them. On Windows, open Network and Sharing Center and choose Change adapter settings. Right-click your active connection and open Properties. Select Internet Protocol Version 4 and open its Properties. Choose to use these DNS server addresses. Enter 8.8.8.8 and 8.8.4.4, which are Google’s public servers. Cloudflare’s 1.1.1.1 also works.
On a Mac, open System Settings, search for DNS, and add the same servers. Remove the old ones. Google explains the setup on its public DNS page. Reload the site after saving. If it now loads, your provider’s resolver was the problem.
Step 5: Inspect the Hosts File
This step fixes the “bad hosts file entry” cause. Confirm it by opening the file and looking for your domain name. If you or a developer tested the site earlier, a line may be left over. Back up the file by copying it first, because a typing error can break other lookups.
On Windows, the file lives at C:\Windows\System32\drivers\etc\hosts. Open Notepad as administrator and open that file. On a Mac, it is at /private/etc/hosts, which you can edit in Terminal or a text editor with administrator rights. Find any line that contains your domain. Delete that line, or put a # at the start to disable it. Save the file.
Flush your DNS cache again, then reload the site. If the site loads, the entry was the cause. If the file had no matching line, move on.
Step 6: Test Your VPN, Antivirus, and Firewall
This step fixes the “VPN, antivirus, or firewall interference” cause. You can confirm it if the error began after you installed or updated one of these tools. Turn the VPN off first and reload the site.
Next, pause your antivirus and firewall for a few minutes. Keep the pause short and do not browse other sites. Load your site once and then turn protection back on at once. If the site loads during the pause, that tool is the cause.
Do not leave protection off. Open the tool’s settings and add your site to its trusted list. If your VPN is at fault, choose a different server or ask its support team. If the error stays with all of these off, the fault is not on your device. Continue to Step 7.
Step 7: Confirm Your Domain Is Active and Not Expired
This step fixes the “expired, suspended, or unregistered domain” cause. It is the most important check when the site fails on every network. Log in to your registrar, which is the company where you bought the domain. Open the domain list and read the status and expiry date.
A healthy domain shows as active with a future expiry date. A broken one may show expired, suspended, on hold, or pending verification. Look in your email for notices about payment or about verifying contact details. Registrars often put a domain on hold until you confirm your email.
If the domain expired, renew it right away. If it is on hold, follow the registrar’s prompts to clear the hold. If you do not own the login, ask whoever bought the domain. Then wait a short while and test again. Our guide on contacting support when your site is down can help if you need a hand.
Step 8: Fix the Nameservers at Your Registrar
This step fixes the “wrong nameservers” cause. Confirm it by comparing two lists. First, find the nameservers your registrar currently uses. Second, find the nameservers your hosting account tells you to use. They should match exactly.
Your host usually lists its nameservers in the account welcome email or in the domain section of the control panel. If you use a service such as Cloudflare for DNS, use the nameservers it gave you instead. Note the current values before you change anything, so you can undo a mistake.
Open the domain’s DNS or nameserver settings at the registrar. Replace the old values with the correct ones. Save the change. Be careful, because wrong nameservers take your whole site and your email offline. If you moved hosts, our guide to migrating a WordPress site away from GoDaddy explains the DNS part of a move.
Step 9: Check the DNS Records for Your Domain
This step fixes the “missing or wrong DNS records” cause. Confirm it by opening the DNS zone at the place that hosts your nameservers. That may be your registrar, your host, or a DNS service. Look for an A record for the bare domain and a record for www.
The A record should hold the server address your host gave you. The www name can be an A record with the same address, or a CNAME that points to your main domain. Compare the address with the one in your hosting account. If it is missing, add it. If it is wrong, correct it.
Copy the old record somewhere safe before you edit it. Do not delete records you do not understand, since email and other services may rely on them. Save the change and give it a few minutes. Then reload the site. If it still fails, the change may still be spreading.
Step 10: Allow Time for DNS Changes to Spread
This step covers the “DNS changes still spreading” cause. You can confirm it if you changed nameservers or records recently. Some devices will load the site while others show the error. That mixed result is the typical sign.
Resolvers hold each answer for a set time, called the TTL. Until it runs out, they may keep serving the old result. The wait can be minutes or can stretch to a day or more, depending on the settings. Do not keep changing records while you wait, because each change restarts the clock.
In the meantime, flush your own cache again and test from mobile data. Try a public resolver as in Step 4. Check back after a few hours. If the problem persists after a full day with correct settings, contact your host or registrar.
Step 11: Correct the Site Address Saved in WordPress
This step fixes the “wrong site address saved in WordPress” cause. Confirm it if the public site works on one address but redirects to a different one that fails. Also check if the admin area sends you to an unknown domain. Take a full backup first, because a wrong address can lock you out. Our guide to backing up WordPress with UpdraftPlus shows how.
If you can reach the dashboard, open the general settings screen. Check the two address fields. Both should show your real domain, with https and without a trailing slash. Correct any wrong value and save.
If you cannot reach the dashboard, edit the wp-config.php file over FTP or your host’s file manager. Make a copy of the file first. The WordPress handbook explains that the WP_HOME and WP_SITEURL constants override the stored values. Add both lines with your correct address, save, and reload. If the address is correct but certificate warnings follow, read our guide to fixing SSL certificate errors in WordPress.
Best Practices to Prevent DNS_PROBE_FINISHED_NXDOMAIN in Future
Most of these causes can be prevented with a few habits. Start with the domain. Turn on auto-renew at your registrar and keep a valid payment method on file. Use an email address that you check often, so renewal and verification notices reach you. Renew for several years if you can.
Protect the nameserver and record settings. Write down your nameservers and your main DNS records in a safe note. Before any move, lower the TTL a day ahead so changes spread fast. Change one thing at a time, and check the result before the next change. Turn on registrar lock so nobody can alter the domain by mistake.
Guard the WordPress address. Never copy a database from staging to live without a careful address check. Test moves on a staging site first. Keep backups so you can roll back quickly. Review the two address fields after any move or restore.
Watch your site from outside. Use an uptime monitor that checks your domain from several places and emails you when it fails. That way you hear about a DNS fault before your visitors do. Check the domain’s expiry date each quarter.
On your own devices, avoid leftover hosts file lines. Remove test entries when you finish. Keep your browser and security tools current. Choose a reliable DNS resolver. Keep our guide to emergency WordPress support handy for the day something breaks.
Conclusion
DNS_PROBE_FINISHED_NXDOMAIN means the lookup said your domain does not exist. You learned how to spot it: a fast failure, a message about the server IP, and a difference between your phone and your computer. Those clues show where to look.
The main causes fall into three groups. On your device, a typo, a stale cache, a bad resolver, a hosts file entry, or a VPN or antivirus can break the lookup. On the domain side, an expired domain, wrong nameservers, missing records, or slow spreading can do it. Inside WordPress, a wrong saved site address can send visitors to a name that does not exist.
The fix process moves from simple to deep. Check the address and test another network. Clear browser data. Flush DNS. Switch resolver. Check the hosts file. Test your VPN and security tools. Then confirm the domain, fix nameservers and records, allow time to spread, and correct the WordPress address.
To prevent a repeat, renew early, record your DNS settings, test moves on staging, and monitor your domain. If you are stuck, our team can check your domain and DNS for you.
James is an experienced WordPress and WooCommerce specialist with over 10 years of practical experience. At WPChatSupport, he creates clear guides that help website owners fix WordPress issues, improve speed, secure their sites, and manage WooCommerce stores with confidence. His expertise includes store setup, plugin configuration, theme customization, payment gateway integration, and website troubleshooting. Through simple and helpful content, James supports users in solving technical problems and following best practices for online business growth.