Every WordPress post has one author. WordPress sets that author for you. It picks the person who was logged in when the post was first saved. Most of the time that is fine. But sometimes the wrong name ends up under a post. This guide shows you how to change the author in WordPress. You will learn six ways to do it. Some fix one post. Others move hundreds of posts at once. You will also learn how to change the name that shows on your site, and how to hide it.
Why You May Need to Change the Author in WordPress
There are many good reasons to swap the author on a post. A writer may have left your team. You may not want their name on your blog any more. An admin may have pasted in a post for a guest writer. In that case the admin gets the credit by mistake. Many sites also start with a user called “admin”. That name looks odd under a post. It also tells strangers one of your login names.
The author matters more than it seems. Most themes print the author name near the post title. Many themes link that name to an author page. That page lists every post by the same person. Search engines and readers both see it. So the right name builds trust. The wrong name can confuse readers or give credit to the wrong person.
What to Check Before You Change a Post Author
First, check your own role. Only an Editor or an Administrator can change the author on someone else’s post. WordPress calls this right “edit others’ posts”. Authors and Contributors do not have it. So they will not see the author option at all. To check your role, open the Users screen in your dashboard. Find your own name and read the Role column.
Next, make sure the new author has an account. You can only pick from users who already exist. If the person is new, open the Users screen and add them first. Give them a role that can write posts. Contributor, Author, Editor and Administrator all work. A Subscriber will not show up in the author list. That role cannot write posts.
Last, think about how many posts you will change. One post is safe to edit by hand. A bulk change is harder to undo. WordPress has no undo button for it. So take a full backup before you move many posts. Our guide on how to back up WordPress with UpdraftPlus walks you through it.
How to Change the Author in WordPress: 6 Methods
Pick the method that fits your task. The first three suit a single post. The last three suit many posts at once.
Method 1: Change the Author in the Block Editor
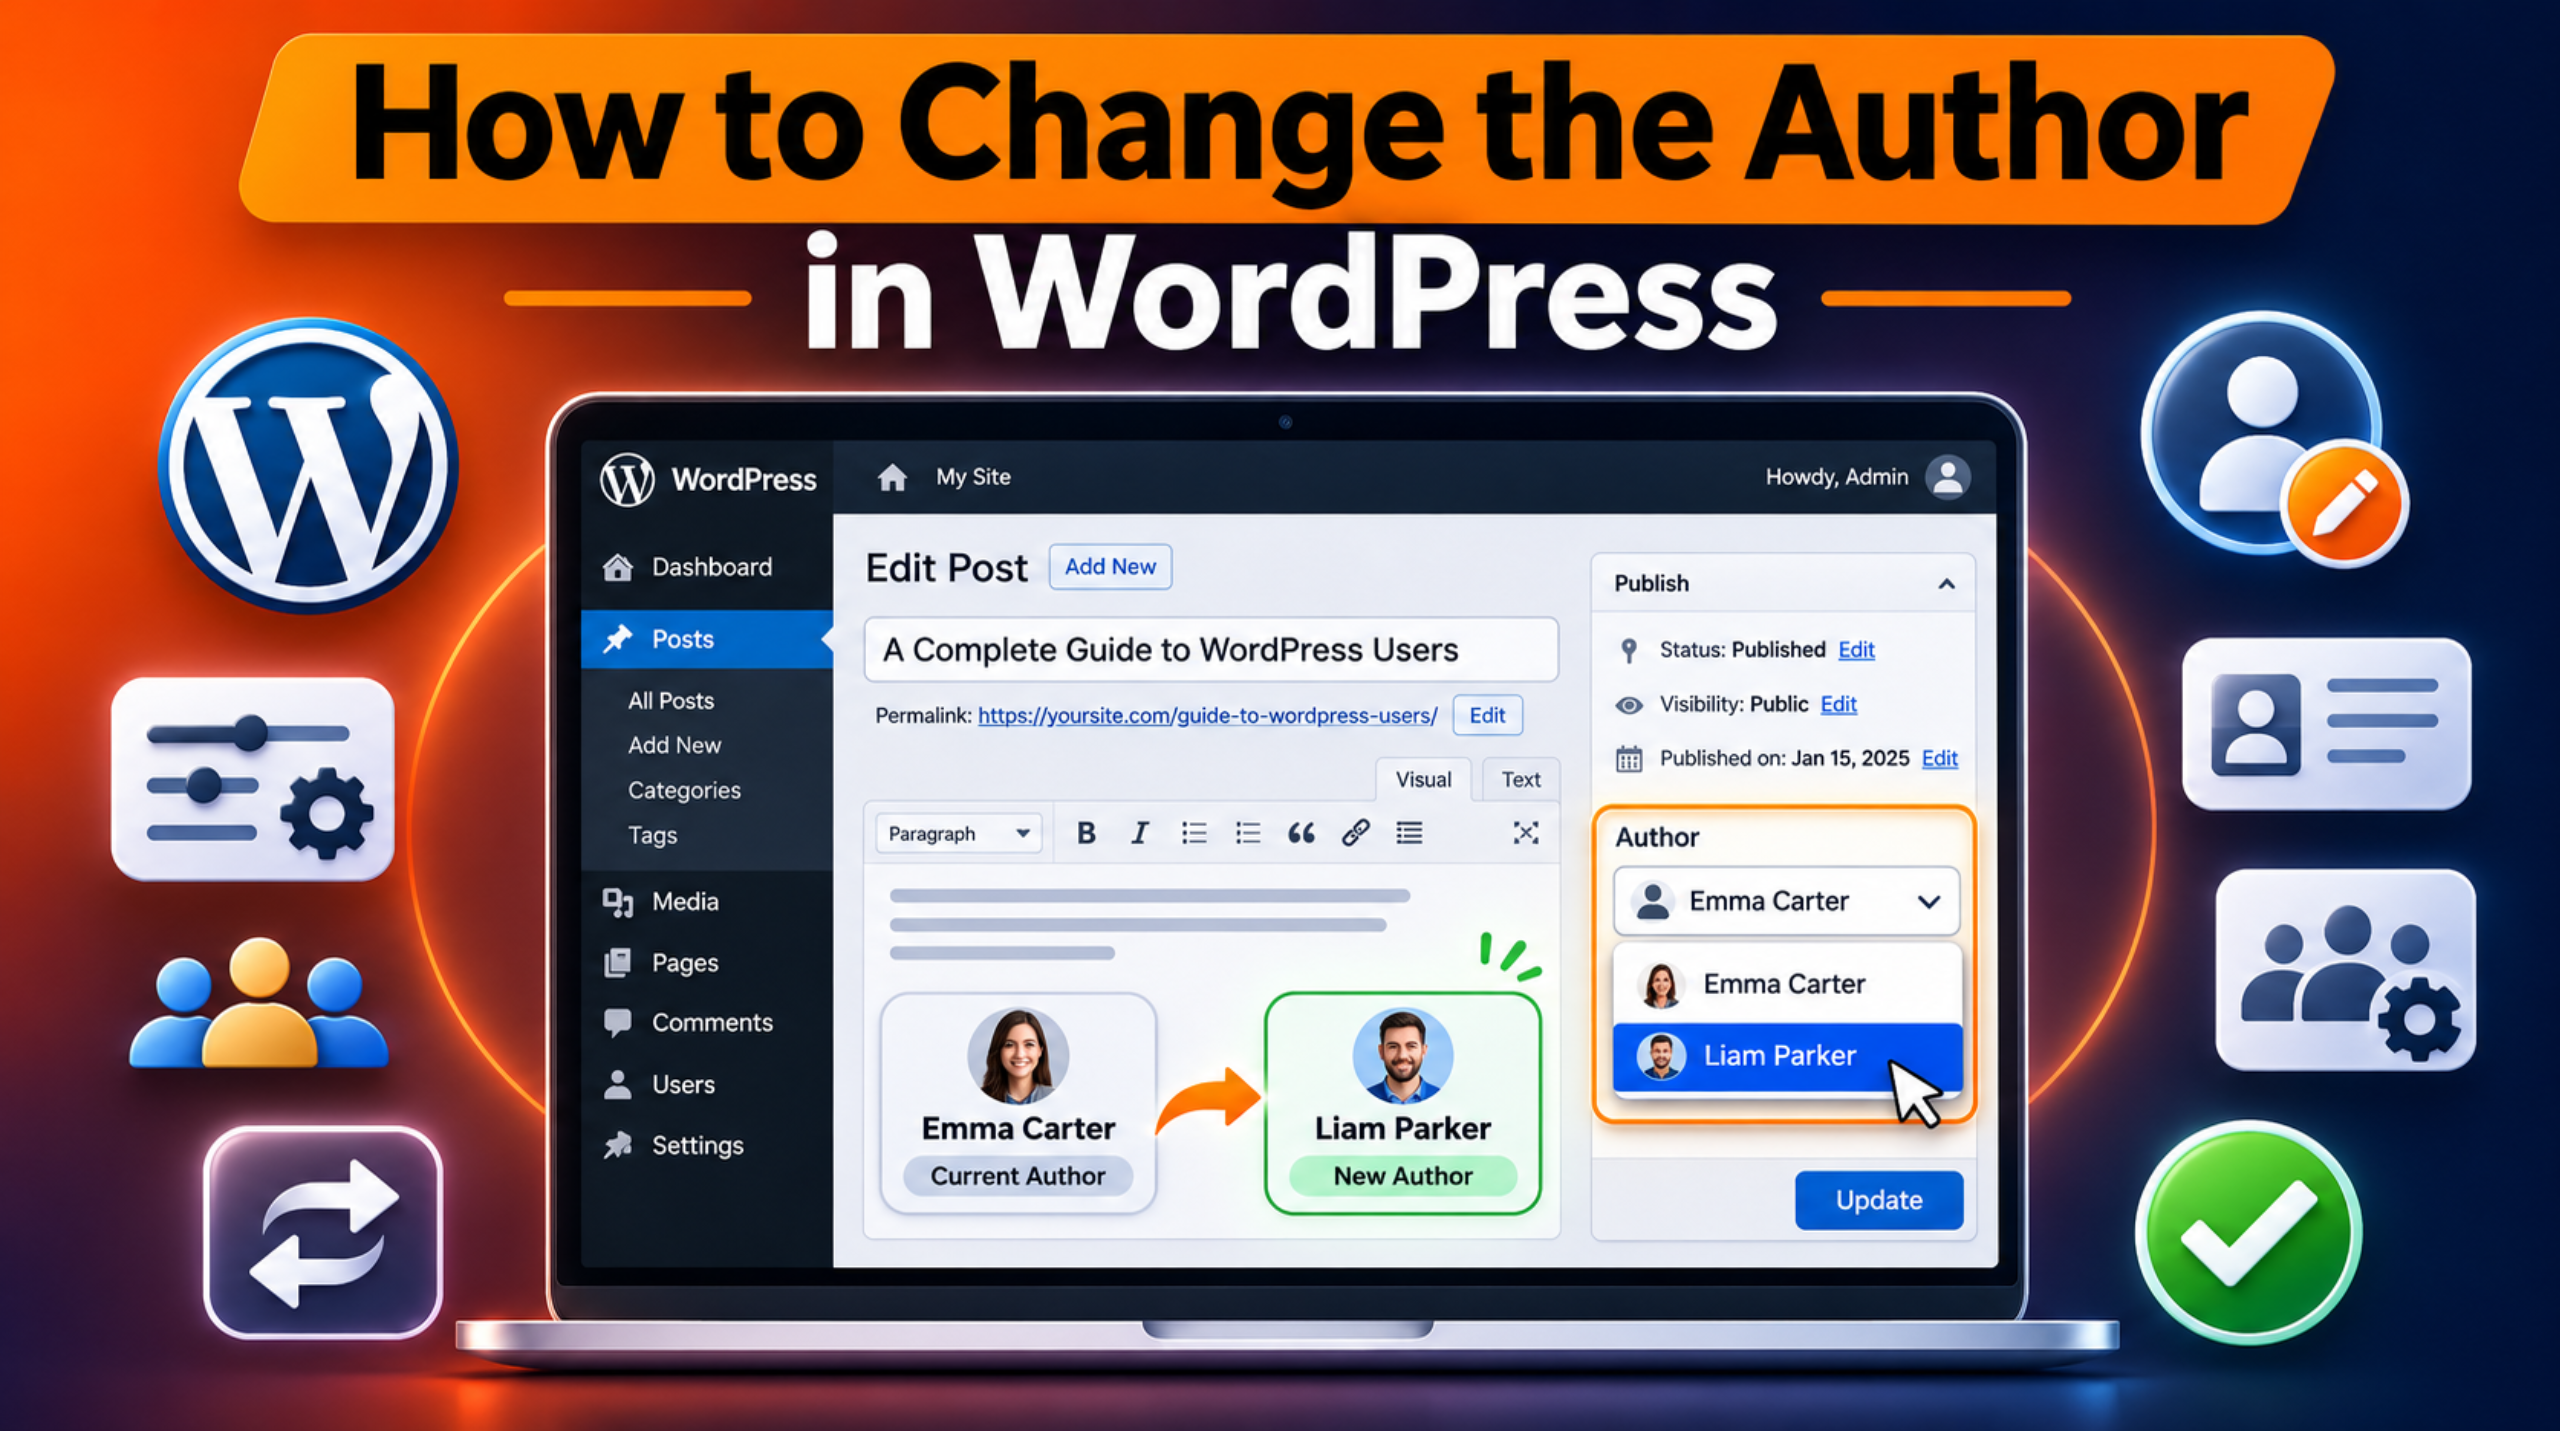
The block editor is the default editor in WordPress. Use this method when you already have the post open. Go to the Posts screen and click the post title. The editor opens. Look for the settings sidebar on the right. If it is closed, click the settings icon at the top right of the screen.
Make sure the Post tab is selected, not the Block tab. Look through the post details near the top. You will see a row named Author. Click the name next to it. A list of users opens. Pick the new author from the list. Then click the Save button at the top. On a live post that button may say Update.
Now view the post on your site. The new name should show near the title. Do you see no Author row at all? Then your role is too low, or your site has only one user who can write.
Method 2: Change the Author in the Classic Editor
Some sites still use the Classic Editor plugin. The steps are a little different there. Open the post from the Posts screen. Scroll down below the main writing area. Look for a box with the title Author. It holds a single dropdown list.
You may not see that box. If so, look at the top right corner of the screen. Click the Screen Options tab. A panel drops down with a list of checkboxes. Tick the one named Author. The box now shows up below the editor. Keep in mind that WordPress only offers it when more than one user can write posts.
Open the dropdown and pick the new author. Then click the Update button in the Publish box. The page reloads with the new author saved. Check the dropdown once more to confirm. It should show the name you picked.
Method 3: Change the Author With Quick Edit
Quick Edit is the fastest way to fix one post. You do not need to open the editor at all. Go to the Posts screen in your dashboard. Move your mouse over the post you want to change. A row of small links shows up under the title. Click the link named Quick Edit.
The row turns into a small form. You will see the title, the slug and the date. You will also see a dropdown named Author. Open it and choose the new author. Then click the Update button on the right side of the form. The form closes on its own.
Now look at the Author column in the posts list. It should show the new name right away. This method changes nothing else on the post. Your text, images and publish date stay the same.
Method 4: Change the Author on Many Posts With Bulk Edit
Bulk Edit moves many posts in one go. It is the best choice when a writer leaves. Start on the Posts screen. Find a post by the old author. Click their name in the Author column. The list now shows only posts by that person.
By default the list shows twenty posts per page. You can raise that number. Click Screen Options at the top right. Change the number of items per page and click Apply. Do not set it too high on a slow server. A few hundred at a time is a safe limit.
Now tick the checkbox at the top of the list. That selects every post on the page. Open the Bulk actions dropdown above the list. Choose Edit and click Apply. A form opens with several fields. Find the Author dropdown and pick the new author. Leave the other fields alone. Then click Update.
WordPress saves every selected post with the new author. Repeat the steps if the old author still has posts on other pages. When the filtered list is empty, the job is done.
Method 5: Move All Posts When You Delete a User
Sometimes you want the old account gone for good. WordPress can move the posts as part of the delete. This step is risky, so take a backup first. One wrong choice here can erase every post that user wrote.
Open the Users screen in your dashboard. Move your mouse over the user you want to remove. Click the Delete link under their name. WordPress does not delete them yet. It opens a new screen and asks what to do with their content.
You get two choices. One deletes all of their content. The other hands it to a different user. Choose the option that attributes the content to another user. Pick the new author from the dropdown beside it. Read the screen twice before you go on. Then click Confirm Deletion.
The old account is now gone. Open the Users screen again and find the new author. The number in their Posts column should be higher than before. Click that number to see the posts they now own.
Method 6: Change the Author With WP-CLI
WP-CLI is a command line tool for WordPress. It suits large sites and people who are at ease with a terminal. It is very fast, and it does not ask you to confirm. So take a backup before you run any command. Test on a staging copy of your site first if you have one.
First, find the ID number of each user. This command lists all users with their IDs:
wp user listNext, list the posts by the old author. Swap the number 2 for the old author’s ID:
wp post list --author=2 --fields=ID,post_titleTo change one post, use its post ID and the new author’s ID. This example gives post 123 to user 5:
wp post update 123 --post_author=5To move every post from user 2 to user 5, join the two commands:
wp post update $(wp post list --author=2 --format=ids) --post_author=5WP-CLI prints a success line for each post it updates. Run the list command for the old author again. It should now return no posts. The official WP-CLI post update page lists every option.
How to Change the Author Name Shown on Your Site
Sometimes the author is right but the name is wrong. For example, the post shows “admin” or a login name. You do not need a new author for this. You only need to change the display name. That is the public name WordPress prints on your site.
Open the Users screen and click the user to edit them. To edit your own name, open your Profile. Scroll to the Name section. Fill in the First Name and Last Name fields. You can also type any name you like in the Nickname field. Now open the dropdown named “Display name publicly as”. It offers each name you just filled in. Pick the one you want readers to see.
Scroll down and click the Update button. The new name now shows on every post by that user. You do not have to edit the posts one by one. Note that the Username field is locked. WordPress does not let anyone change a username, not even an admin. The official Profile screen guide explains each field.
How to Hide the Author Name on WordPress Posts
Some sites do not want to show an author at all. A company blog with one voice is a good example. WordPress still stores an author for every post. But your theme decides if the name is shown. So you hide the name in the theme, not in the post.
Block themes use the Site Editor. Open Appearance in your dashboard and choose Editor. Open Templates and pick the one for single posts. Click the author name in the preview. The block may be called Author Name, Avatar or Author Biography. Older sites may have a single block called Author. Open the block’s options menu and choose Delete. Then click Save.
Classic themes work in a different way. Many of them have a setting for post details. Open Appearance and choose Customize. Look for a section about blog or post settings. Some themes have a switch to hide the author there. Others do not. If yours has none, check the theme’s own help pages.
A template change affects every post that uses it. So view two or three posts after you save. The author name should be gone from all of them.
How to Confirm the Author Change Worked
Always check your work after a change. Start with the Posts screen. The Author column should show the new name beside each post you changed. Next, open the Users screen. The Posts column shows how many posts each user owns. The new author’s count should have gone up. The old author’s count should have gone down.
Now check the front of your site. Open one of the changed posts in a new tab. Look for the name near the title or at the end of the post. If the name links to an author page, click it. The post should be listed on the new author’s page.
Does the old name still show? Your site may be serving a saved copy of the page. Clear your cache plugin and reload. Try a private browser window too. Our guide on a WordPress site not updating right away covers this in depth. If posts seem to be missing after a bulk move, see why WordPress posts may not show on the blog page.
Frequently Asked Questions
Here are short answers to the questions people ask most about post authors.
Why can’t I see the Author option in WordPress?
There are three common reasons. The first is your role. Only Editors and Administrators can change the author of another person’s post. The second is your user count. If only one user can write posts, there is no one else to pick. The third applies to the Classic Editor. The Author box may be switched off in Screen Options. Tick it there and it will come back.
Does changing the author change the publish date?
No, it does not. The publish date stays just as it was. Your text, images, categories and tags stay the same too. WordPress only swaps the user linked to the post. It does note that the post was edited, as with any saved change. Readers will still see the first publish date unless your theme shows the last update.
Can a WordPress post have more than one author?
Not on its own. WordPress stores one author per post. That is how the core software is built. To credit two or more writers, you need a plugin. Co-Authors Plus is a well-known free one. You can also name the second writer in the post text itself. That simple fix needs no plugin at all.
Can I change the author of a page?
Yes, you can. Pages have an author too, just like posts. The steps are the same as the ones above. Open the Pages screen in place of the Posts screen. Then use the editor, Quick Edit or Bulk Edit. The same is true for most custom post types. The author option shows up when the post type supports authors.
Can I see who edited a post after the author changes?
Yes, in most cases. WordPress keeps a history of saved versions for each post. These are called revisions. Each one records who made that edit and when. Changing the author does not erase this history. If your list of past versions is empty, read our guide on WordPress revisions not showing.
Conclusion
You now know how to change the author in WordPress in six ways. For one post, use the editor or Quick Edit. For many posts, use Bulk Edit. To remove an old account, delete the user and hand their content to someone else. For very large sites, WP-CLI does the job in seconds. Always back up first before any bulk change.
Remember the two extra tricks as well. If only the name is wrong, change the display name in the user profile. If you want no name at all, remove the author block from your theme template. Then check the Posts screen and the live site to confirm.
Good user management keeps a site tidy and safe. If you also need to control who can view your content, read how to add age verification to WordPress. Stuck on a step, or locked out of your dashboard? See how to get WordPress support and let an expert sort it out for you.

James is an experienced WordPress and WooCommerce specialist with over 10 years of practical experience. At WPChatSupport, he creates clear guides that help website owners fix WordPress issues, improve speed, secure their sites, and manage WooCommerce stores with confidence. His expertise includes store setup, plugin configuration, theme customization, payment gateway integration, and website troubleshooting. Through simple and helpful content, James supports users in solving technical problems and following best practices for online business growth.