Introduction
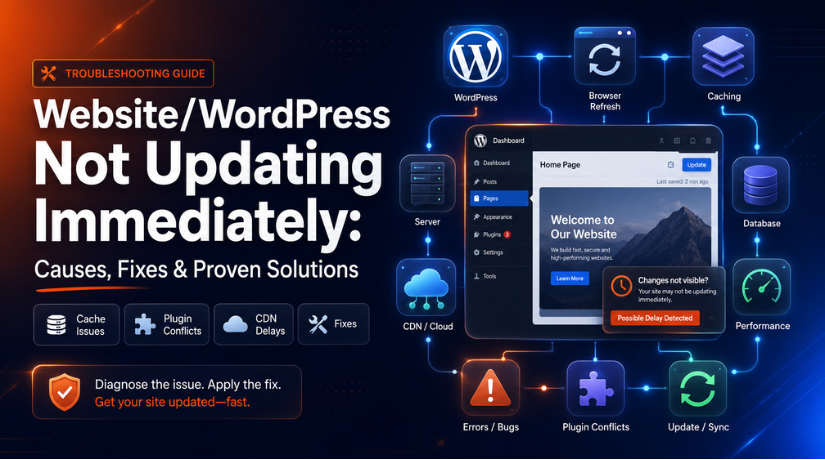
Many website owners feel confused when they update their website. They change text, images, menus, products, or page design. WordPress may show that the change has been saved. But the live website still shows the old version. This issue is very common on WordPress websites. It can happen to blogs, business sites, service pages, and online stores. The good news is that it is usually easy to fix.
In most cases, the main reason is a WordPress cache issue. Cache stores old website files to make pages load faster. This helps visitors open your website quickly. But sometimes, it also shows an old saved copy. That is why WordPress changes not showing can happen after an update. You may update a page correctly, but users still see old content. Sometimes, the issue appears only on your browser. Sometimes, it appears for all website visitors. This can create stress, especially after important changes.
This guide will explain the issue in simple words. You will learn what it means and why it happens. You will also understand the first signs of the problem. Later, you can follow clear steps to fix it properly.
What Does “Website Not Updating Immediately” Mean in WordPress?
Website or WordPress not updating immediately means your change is saved, but visitors cannot see it yet. The backend may show the latest version. But the frontend may still show the old page. This is the primary cause of many users’ searches for WordPress upgrades that don’t display changes.
For example, you may update the text on a service page. WordPress may save the new text correctly. But when you open the page in your browser, the old text still appears. This does not always mean the content was not saved. It may mean your browser, cache plugin, hosting server, or CDN is still loading an older copy.
The same issue can happen with images. You may replace an old banner with a new one. But your website may still show the old banner. This often happens when the image file name stays the same. Browsers and CDNs may keep loading the earlier image from cache.
This issue can also affect website design. You may change button colors, spacing, font size, layout, or CSS. But the design may look unchanged on the live site. This usually happens because old CSS or JavaScript files are still loading. In that case, it becomes a WordPress cache issue or an optimization cache issue.
Reasons Why Website or WordPress Changes Not Showing on the Website
When your WordPress not updating issue appears, cache is usually the first reason. But cache is not the only cause. Your browser, WordPress plugin, hosting server, CDN, or page builder may show an old version. So, it is important to check each reason carefully.
Browser Cache May Be Showing the Old Website Version
Website files are kept on your device in the browser cache. Images, CSS, JavaScript, fonts, and page data are all included in these files. This helps websites load faster when you visit them again. But it can also cause WordPress changes not showing after updates.
For example, you may update a homepage image today. But your browser may still show yesterday’s image. This happens because the browser loads the saved file. It may not request the latest file from your server.
Hosting or Server Cache May Still Be Active
Some hosting companies use server-level cache. This cache works outside your WordPress dashboard. It can stay active even if you do not use a cache plugin.
Server cache may include LiteSpeed cache, NGINX cache, Varnish cache, or managed WordPress cache. These systems save page copies to improve speed. But they may also delay new updates.
Object Cache May Show Old Dynamic Content
Object cache stores database results for faster loading. It is useful for WooCommerce stores, membership sites, LMS websites, and large blogs. But old object cache can show old dynamic data.
This issue may affect product prices, stock status, menus, widgets, and user dashboards. For example, you may update a WooCommerce product price. But customers may still see the old price.
CSS or JavaScript Optimization May Delay Design Changes
Speed plugins often optimize CSS and JavaScript files. They may combine, minify, defer, or delay these files. This improves speed, but it can delay visible design updates.
For example, you may change a button color. But the old color may still show on the website. You may update a menu style, but the old design appears.
Same Image File Name May Keep Showing Old Images
Image cache is another common reason for website changes not showing. This happens when you replace an image with the same file name. For example, you upload a new image as homepage-banner.jpg.
Your browser or CDN may still load the old image. This happens because the file name did not change. Cache systems may think it is the same file.
Wrong Page, Template, or Website Version May Be Edited
Sometimes, cache is not the real issue. You may have edited the wrong page, template, or website version. This is common on websites using staging sites or theme builders.
You may edit a draft instead of a published page. You may update the staging website instead of the live website. You may also edit one template while another template controls the page.
DNS or Migration Delay May Show the Old Website
DNS delay can happen after moving a website to new hosting. Some users may see the new website. Others may still see the old server for some time.
This makes it look like WordPress updates are not visible. But the real issue may be domain records. Nameservers or A records may still be updating.
Quick Checklist Before Fixing the Website Update Issue
Check If the Page or Post Is Published
First, check if your page or post is published. Sometimes, users save content as a draft. In that case, visitors cannot see the update. Also check if the page is private or scheduled. A scheduled post will only appear at the selected time.
Hard Refresh the Page
A hard refresh forces your browser to load fresh website files. On Windows, press Ctrl + F5 or Ctrl + Shift + R. On Mac, press Cmd + Shift + R. This simple step can fix many WordPress not updating issues.
Test the Page on Another Device
Open the same page on another phone, laptop, or tablet. This helps you know if the issue is only on your device. If the update appears on another device, your main browser or device cache may be the problem.
Test the Website Using Mobile Data
Sometimes, a local network may show old cached content. Switch from Wi-Fi to mobile data and check the page again. This helps confirm if the issue is linked to your internet connection or local network cache.
Log Out and Test as a Normal Visitor
Log out of WordPress and open the page again. Admin users may see fresh content, while visitors may see cached content. Testing as a normal visitor helps you understand what real users can see.
Confirm You Edited the Live Website
If your website has a staging version, check that you edited the live site. Many WordPress updates not visible issues happen because users update staging instead of live. Always confirm the website URL before making changes.
Check Hosting and CDN Cache
Your hosting server or CDN may also show old content. This can happen even after clearing browser and plugin cache. Check your hosting panel and CDN dashboard. Then clear or purge the cache for the affected page.
How to Fix Website/WordPress Not Updating Immediately (Step By Step)
Step 1: Hard Refresh Your Browser First
- Open the affected page in your browser.
- Press Ctrl + F5 or Ctrl + Shift + R on Windows.
- Press Cmd + Shift + R on Mac.
- This forces the browser to load fresh page files.
- If the new content appears, browser cache causes the issue.
Step 2: Clear Your Browser Cache
- Open your browser settings.
- Go to the privacy, history, or browsing data section.
- Select cached images and files.
- Clear the selected cache files.
- Reload the website and check the update again.
- This helps when WordPress changes not showing only on your device.
Step 3: Check the Page in Incognito Mode
- Open the same page in incognito mode.
- Check if the latest update appears there.
- If it appears, your normal browser is loading old files.
- You can also test the page in another browser.
- This helps confirm a browser cache issue.
Step 4: Clear Your WordPress Cache Plugin
- Log in to your WordPress dashboard.
- Find your cache plugin settings.
- Click Clear Cache, Purge Cache, Delete Cache, or Empty Cache.
- Open the page again in incognito mode.
- This step often fixes a WordPress cache issue.
Step 5: Clear Hosting or Server Cache
- Log in to your hosting panel.
- Look for cache, speed, performance, or WordPress tools.
- Click Clear Cache, Purge Cache, or Flush Cache.
- Check the page again after clearing the server cache.
- If you cannot find this option, contact your hosting provider.
Step 6: Clear CDN Cache If Your Website Uses a CDN
- Open your CDN dashboard.
- Select your website domain.
- Purge the affected page URL first.
- Clear the full CDN cache only if many pages are affected.
- Test the page again in incognito mode.
- This helps when website changes are not showing for visitors.
Step 7: Clear Page Builder Cache
- Open your page builder settings or tools area.
- Look for options like Regenerate CSS, Clear Files, or Clear Builder Cache.
- Run the available cache-clearing option.
- Save the page again.
- Clear WordPress and CDN cache if needed.
- Test the page in incognito mode.
Step 8: Clear CSS and JavaScript Optimization Cache
- Open your speed or performance plugin settings.
- Clear minified CSS and JavaScript files.
- Regenerate critical CSS if the option is available.
- Temporarily disable CSS or JavaScript optimization for testing.
- Check if colors, buttons, menus, layouts, or fonts update correctly.
Step 9: Rename and Reupload Updated Images
- Rename the new image before uploading it.
- Use a fresh file name like homepage-banner-new.jpg.
- Upload the new image to the WordPress Media Library.
- Replace the old image on the page.
- Clear browser, WordPress, and CDN cache.
- Check the page again.
Step 10: Confirm You Edited the Correct Page
- Check the exact page URL.
- Make sure the page is published.
- Confirm you edited the live website, not staging.
- Check if the correct homepage is selected.
- If you use templates, confirm the right template is active.
- Test the page again as a logged-out visitor.
Step 11: Flush Object Cache for Dynamic Website Data
- Check if your website uses Redis, Memcached, or object cache.
- Use this step for WooCommerce prices, stock, menus, or widgets.
- Open your hosting panel and look for object cache settings.
- Flush the object cache if the option is available.
- If you are unsure, ask your hosting provider to flush it.
- This helps when WordPress updates are not visible on dynamic pages.
Step 12: Check DNS After Website Migration
- Use this step if your website recently moved hosting.
- Check your domain nameservers.
- Confirm the A record points to the correct server.
- Test the website from another network.
- Check the site using mobile data.
- Avoid editing the old hosting copy by mistake.
- DNS delay can make some users see the old website.
How to Prevent WordPress Update Delay in the Future
Use Only One Main Cache Plugin
Use just one reliable cache plugin for your WordPress website. Multiple cache plugins can create conflicts. They may also store different page copies. This can make WordPress changes not showing more often. A single cache plugin is easier to manage and clear.
Connect Your CDN and Cache Plugin Properly
If you use a CDN, connect it properly with your WordPress cache plugin. This helps cache clear automatically after updates. If the CDN cache is not refreshed, website changes not showing may continue for visitors. Proper setup keeps your live website fresh.
Exclude Dynamic Pages from Cache
Certain websites shouldn’t be cached. This is crucial for membership websites and WooCommerce. Cart, checkout, my account, login, and user dashboard pages should show fresh data. Excluding these pages can prevent WordPress updates not visible issues.
Rename Images Before Replacing Them
Always rename important images before uploading new versions. If you use the same file name, old images may still appear. This can happen due to browser cache or CDN cache. A fresh file name helps the website load the new image quickly.
Keep Staging and Live Websites Clearly Marked
If you use a staging website, keep it clearly marked. This helps you avoid editing the wrong website version. Many WordPress not updating issues happen because changes are made on staging instead of live. Always check the URL before editing.
Test Every Major Update as a Logged-Out Visitor
While visitors see content that has been cached, admin users might see new stuff. Log out and test the page following significant updates. Another option is to utilise incognito mode. This displays the content that actual users can see on your website.
Clear WordPress Cache After Important Updates
Clear your WordPress cache after major content or design changes. This includes homepage edits, service page updates, menu changes, and product changes. Regular cache clearing can prevent a WordPress cache issue from confusing visitors.
Keep Plugins, Themes, and WordPress Updated
Cache or display issues can be brought on by outdated plugins and themes. Update WordPress’s core, themes, and plugins. Security, performance, and compatibility all improve as a result. Additionally, it lessens the possibility that WordPress updates won’t display properly.
Conclusion
WordPress website should show updates after saving changes. But sometimes, old content still appears on the live site. This usually happens because of browser cache, WordPress cache, hosting cache, CDN cache, or page builder files. In some cases, the issue may come from object cache, image file names, DNS delay, or editing the wrong website version.
The best way to fix this issue is to follow a clear process. Start with a hard refresh and incognito test. Then clear browser cache, WordPress cache, hosting cache, and CDN cache. If the issue continues, check page builder cache, CSS files, image names, object cache, and staging settings.
Website changes not showing can affect visitors, sales, trust, and user experience. So, it is important to fix the issue quickly. Regular testing after updates can also prevent the same problem in the future.
You can contact WPChatSupport to review why your WordPress changes are not showing correctly. Their team can help check cache settings, hosting cache, CDN rules, CSS or JavaScript issues, and other possible causes.
For support, you can call WP Chat Support at +1 888 602 0119 or visit the website for more details.
James is an experienced WordPress and WooCommerce specialist with over 10 years of practical experience. At WPChatSupport, he creates clear guides that help website owners fix WordPress issues, improve speed, secure their sites, and manage WooCommerce stores with confidence. His expertise includes store setup, plugin configuration, theme customization, payment gateway integration, and website troubleshooting. Through simple and helpful content, James supports users in solving technical problems and following best practices for online business growth.